art lesson may 4-8
This week we will be creating "Mural Art to Make People Smile"
Start by watching this YouTube video reading of our classroom book, Maybe Something Beautiful written by F. Isabel Campoy and Theresa Howell, illustrated by Rafael Lopez. www.youtube.com/watch?v=nL5TzKaDXzA
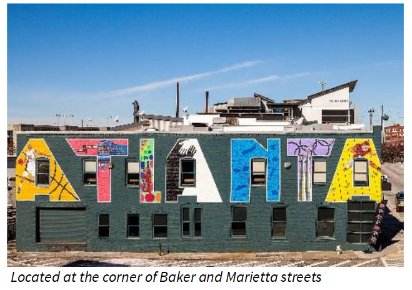
In the book, "Maybe Something Beautiful" Mira meets a man with an art job. What does he do? Yes, he’s a muralist. A muralist is an artist who designs, paints and/or creates large paintings on walls and ceilings. Some cities hire muralists to paint on public buildings or structures.
Have you ever seen murals around your area before?
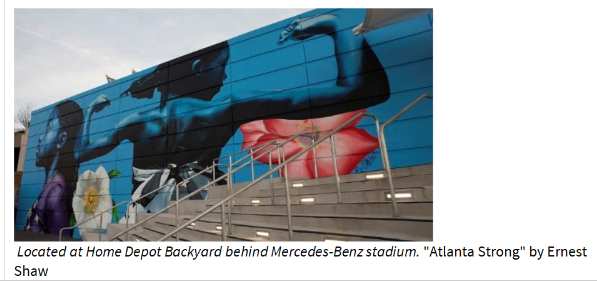
Here are some examples from towns in our area:
Start by watching this YouTube video reading of our classroom book, Maybe Something Beautiful written by F. Isabel Campoy and Theresa Howell, illustrated by Rafael Lopez. www.youtube.com/watch?v=nL5TzKaDXzA
In the book, "Maybe Something Beautiful" Mira meets a man with an art job. What does he do? Yes, he’s a muralist. A muralist is an artist who designs, paints and/or creates large paintings on walls and ceilings. Some cities hire muralists to paint on public buildings or structures.
Have you ever seen murals around your area before?
Here are some examples from towns in our area:
|
|
After looking at these examples, use your best drawing/painting/coloring skills to:
1) Create an artwork for someone that will put a smile on their face. Think about what they like and put that in your artwork.
2) Take a photo of your artwork and text or email it to the person you made it for. You could also mail them the artwork or photo with a letter. 3) How could you turn your artwork into a mural? Where would you paint your mural? Why?
Feeling inspired?
Create an artwork for your neighborhood! You can make a sidewalk chalk mural, create art from nature, or make and artwork and hang it in a window. Always ask for help from adults when you use art materials!
art lesson april 27-may 1
Art Zoom meeting with Mrs. Stevens will be Tuesday, April 28th from 11-11:30 am! The link is on your teacher's classroom blog :) I hope to see you there! For those of you who can't make it, we will be making leaf rubbings. The directions to make your own leaf rubbings are below:
Supplies:
Directions:
1. Put a leaf upside down on the table.
2. Place a piece of paper over the leaf.
3. While holding the paper and leaf in place, use the side of a crayon to rub across the leaf.
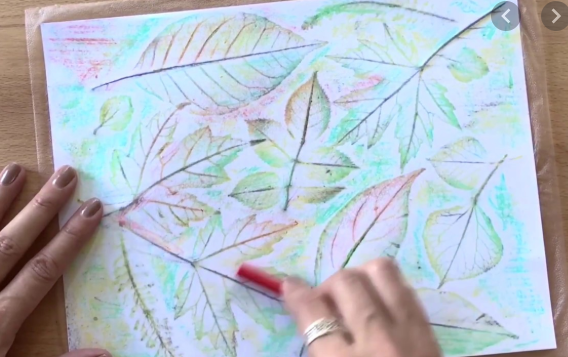
4. Make sure that you color over the entire leaf. Rubbing firmly all over the leaf will show the veins and the outline of the leaf
5. A dark crayon will produce a clearer print of the leaf.
6. Do another leaf with different color crayon OR trying mixing two colors to see what happens :)
Be creative.
Example of what our leaf rubbings will look like:
Supplies:
- Different sizes and shapes of tree leaves
- paper
- crayons without the wrapper on them
Directions:
1. Put a leaf upside down on the table.
2. Place a piece of paper over the leaf.
3. While holding the paper and leaf in place, use the side of a crayon to rub across the leaf.
4. Make sure that you color over the entire leaf. Rubbing firmly all over the leaf will show the veins and the outline of the leaf
5. A dark crayon will produce a clearer print of the leaf.
6. Do another leaf with different color crayon OR trying mixing two colors to see what happens :)
Be creative.
Example of what our leaf rubbings will look like:
Art lesson april 20-24
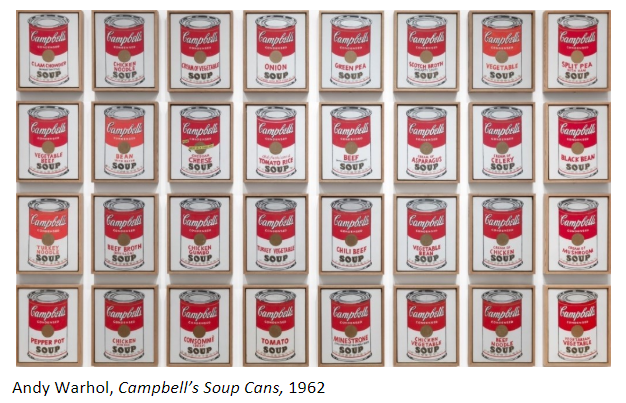
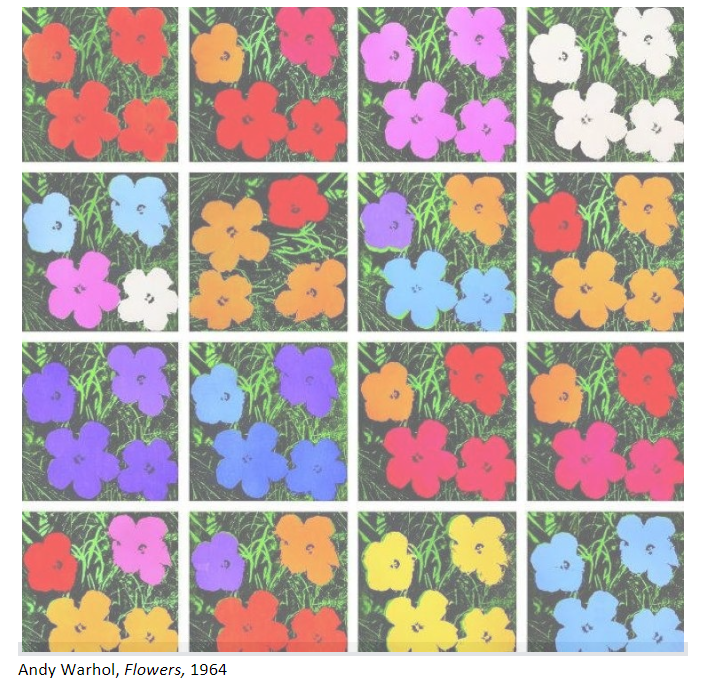
Did you know that Andy Warhol ate the same thing for lunch every day: a can of tomato soup?
He said, “I used to have the same lunch every day, for twenty years, I guess, the same thing over and over again.”
Andy Warhol would make artwork of the cans of soup because he knew other people would recognize the packaging.
Today, make a drawing of what you like to eat for lunch. How will you represent, or show, your meal?
Add in bright colors that will make your art “pop”.
First, watch this video to learn about Pop Art: www.youtube.com/watch?v=DhEyoDCTSDQ
Then, share what you learned about Pop Art with 3 family members :)
Next, Read the picture book “Uncle Andy” about Andy Warhol: www.youtube.com/watch?v=38GvgFYsAcw
Then, share with a family member 3 interesting facts you learned about the artist, Andy Warhol.
Ready to get creative?
Use the artwork below by Andy Warhol to create your Andy Warhol- inspired Pop Art meal! You can simply draw your meal on any paper you have on hand and use any art material you have available to add color!
Share your artwork by posting a picture of it on the Share Your Art page of this blog!
|
|
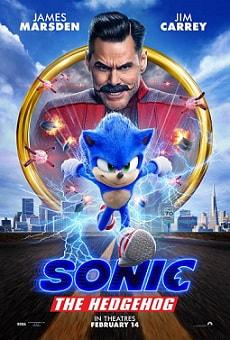
Art Lesson April 13-17
Ready for some drawing fun?! This week, in honor of the new Sonic the Hedgehog movie, we will be drawing Sonic with the help of our friends at Art for Kids Hub! All you need is a piece of paper, a pencil to draw with, and ANYTHING to color with :) Make sure to add your extra details when you finish drawing Sonic AND upload a picture of your drawing to the "Share your ART" page of this blog.
Have fun! Link to How to Draw Sonic, here: www.youtube.com/watch?v=cd4fYncwbj4
Have fun! Link to How to Draw Sonic, here: www.youtube.com/watch?v=cd4fYncwbj4
march 30- April 3
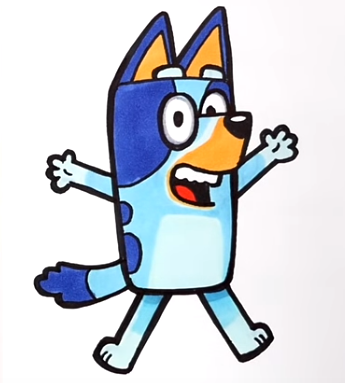
This week, we are going to learn how to draw Bluey from the Disney+ show!
Supplies Needed:
www.youtube.com/watch?v=lSSYciuiKSA
When you're done drawing and coloring Bluey, you can add a background. Be creative! Where does Bluey live? What is Bluey doing today? Maybe you can draw friends for Bluey to play with? The possibilities are endless :)
Supplies Needed:
- Something to draw with (pencil suggested!)
- A piece of paper
- Something to color with (can be anything! markers...crayons...colored pencils...you decide!)
www.youtube.com/watch?v=lSSYciuiKSA
When you're done drawing and coloring Bluey, you can add a background. Be creative! Where does Bluey live? What is Bluey doing today? Maybe you can draw friends for Bluey to play with? The possibilities are endless :)
Art lessons for march 16-18
Students, check out this book called "Arnie the Doughnut" and then try your best to draw a funny faced doughnuts by using our favorite YoutTube drawing channel, Art for Kids Hub. Remember, if you need more time on the drawing video, you can pause it :)
Links here: Arnie the Doughnut (click link to listen) AND How to Draw a Donut Stack (click link to draw)
Links here: Arnie the Doughnut (click link to listen) AND How to Draw a Donut Stack (click link to draw)
art lesson for march 23-27
This week we are making art using symmetry.
What is symmetry?
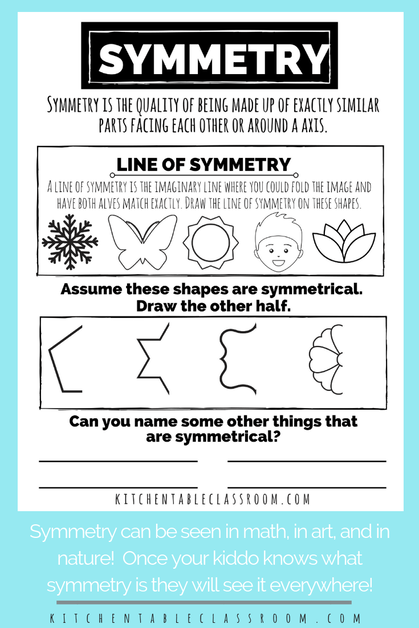
Put simply, symmetry is the quality of being made up of exactly similar parts facing each other or arranged around an axis.
Don't worry...we will look at examples in everyday life to understand that definition! Designs most pleasing to the human eye are often the most symmetrical.
If you have a printer available, print the "SYMMETRY" sheet below to practice completing the other half of symmetrical items.
Source: https://www.kitchentableclassroom.com/what-is-symmetry-project-free-printable/
What is symmetry?
Put simply, symmetry is the quality of being made up of exactly similar parts facing each other or arranged around an axis.
Don't worry...we will look at examples in everyday life to understand that definition! Designs most pleasing to the human eye are often the most symmetrical.
If you have a printer available, print the "SYMMETRY" sheet below to practice completing the other half of symmetrical items.
Source: https://www.kitchentableclassroom.com/what-is-symmetry-project-free-printable/
Once you've practiced completing the symmetrical drawings, you're ready to put that practice into action by creating a fictional "Symmetry Name Creature!"
To complete this project, you will need:
Paper
Pencil
Markers (crayons or colored pencils will work too!)
*For a video tutorial of this project, click this link: www.kitchentableclassroom.com/what-is-symmetry-project-free-printable/?jwsource=cl
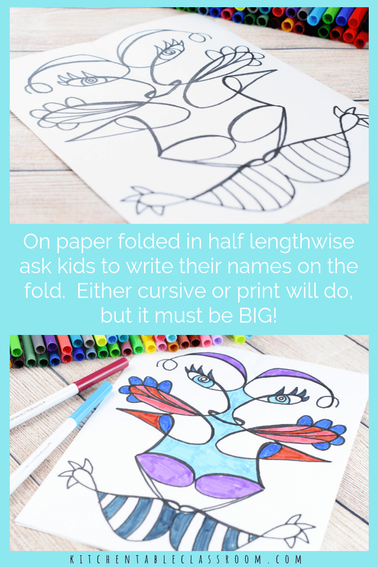
Step 1: Start with a piece of white paper folded in half long ways aka: the “hot dog way.”
Step 2: On one side of the fold write your name with the bottom sitting on the fold. If you can write in cursive then you may do so. If you don't write in cursive, that's okay too! Write big. This is vital to the success of the project. Write big.
Example:
Step 3: Once you have a name written nice and large it’s time to transfer the image to the opposite side of paper to get that symmetrical image.
This is easy and requires no special transfer paper. Make sure the pencil line of your drawing is nice and thick. Close the paper and use the closed lid of a Sharpie to rub over the pencil line. You will be rubbing on the back of the side of the paper that has no image. You should be able to see through that one layer of paper to see where your lines are.
That little bit of pressure will transfer enough pencil lead to the blank side of the paper that your image can be seen.
TRANSFORMING A NAME INTO A SYMMETRICAL CREATURE…
Once the name image is transferred you have this weird, awesome symmetrical shape. Set your imagination loose as you add parts, patterns, and pieces to your design to turn it into a imaginary creature.
Use the same method as above. Draw only on one side and transfer the image to the opposite side.
